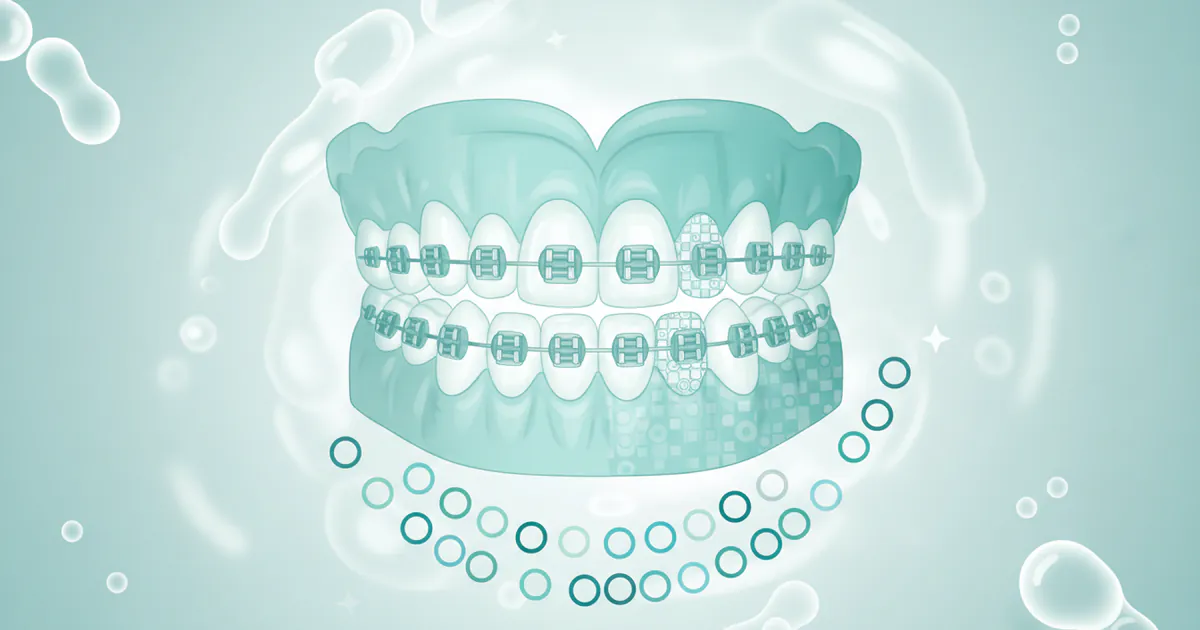
Best Braces Colors: Complete Guide
Key Takeaways
- Embarking on an orthodontic journey with braces is a significant step towards achieving a healthier, more confident smile. For many, especially children, teenagers, and even adults, one of the most exciting aspects of traditional braces is the ability to personalize them with different colors. Choos
Best Braces Colors: Complete Guide
Embarking on an orthodontic journey with braces is a significant step towards achieving a healthier, more confident smile. For many, especially children, teenagers, and even adults, one of the most exciting aspects of traditional braces is the ability to personalize them with different colors. Choosing the best braces colors allows you to express your personality, match your style, or even celebrate holidays. In fact, studies show that personalization options, even small ones like brace colors, can significantly improve a patient's compliance and overall experience with orthodontic treatment. This comprehensive guide from SmilePedia.net will explore everything you need to know about selecting your braces colors, understanding how they work, caring for them, and navigating the broader world of orthodontics.
Key Takeaways:
- Braces colors are applied via elastic ligatures: These small bands hold the archwire to the brackets and are changed at every adjustment appointment.
- Color choice is personal: While there are popular trends, the "best" color is one that makes you feel confident and happy.
- Staining is a factor: Darker foods and drinks can stain lighter ligatures; choose colors wisely if staining is a concern.
- Costs are typically included: Changing ligature colors is part of your regular orthodontic adjustment appointment and does not incur additional fees. The total cost of traditional braces in the US generally ranges from $3,000 to $7,500.
- Frequency of change: Colors are usually changed every 4-8 weeks during routine visits.
- Orthodontic benefits beyond aesthetics: While colors are fun, the primary purpose of braces is to correct malocclusions, improve oral health, and enhance chewing function.
- Retention is key post-treatment: After braces, an Essix retainer or similar device is crucial for maintaining your newly aligned smile.
What Are Braces Colors and How Do They Work?
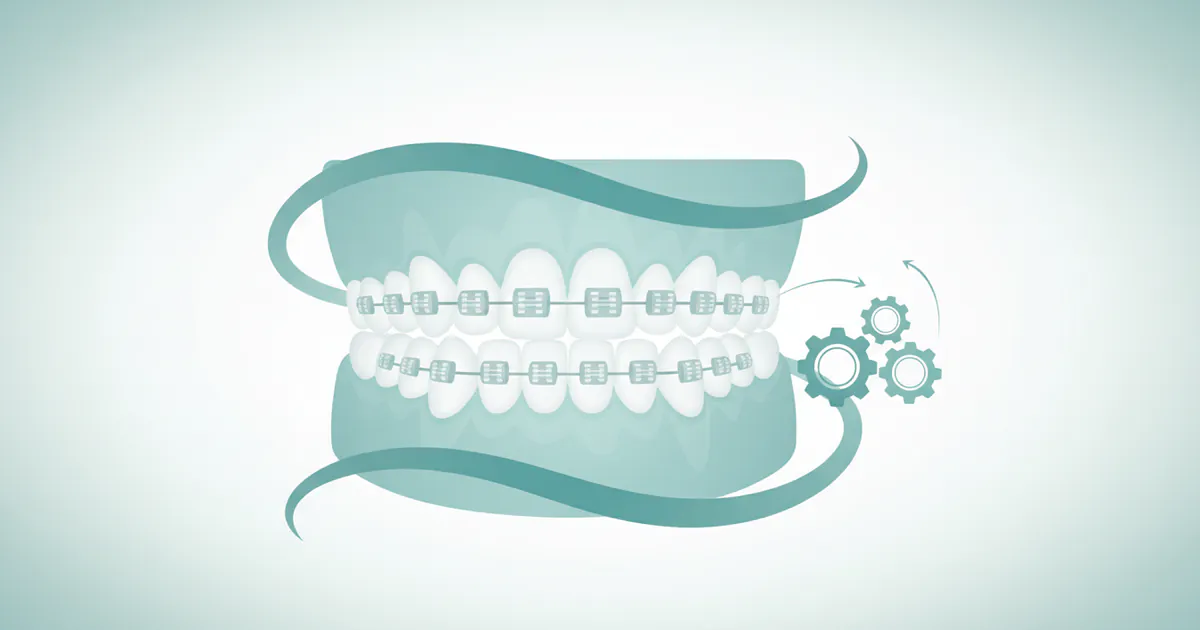
When we talk about "braces colors," we're referring to the tiny elastic bands, known as ligatures, that fit around each individual bracket on traditional metal or ceramic braces. These ligatures serve a crucial function: they hold the archwire in place within the bracket slots. The archwire is the main component that applies gentle, continuous pressure to your teeth, gradually moving them into their correct positions.
Without these elastic ligatures (or self-ligating brackets which have built-in clips), the archwire wouldn't be able to effectively transmit force to the teeth. These ligatures are small, durable, and come in a vast array of colors, from vibrant neons to subtle pastels, and even clear or metallic shades. They are typically made of medical-grade rubber or silicone, designed to be safe for oral use and resistant to breakage.
At each of your orthodontic adjustment appointments, your orthodontist or dental assistant will remove the old ligatures, adjust the archwire (or replace it with a new one), and then apply fresh ligatures. This is the moment you get to choose your new color scheme! This regular change ensures hygiene, maintains optimal force application, and offers a fun opportunity for personalization.
Types of Braces and Their Color Customization Potential
The ability to customize brace colors is primarily associated with traditional metal braces. However, it's worth understanding how other types of braces interact with the concept of "color."
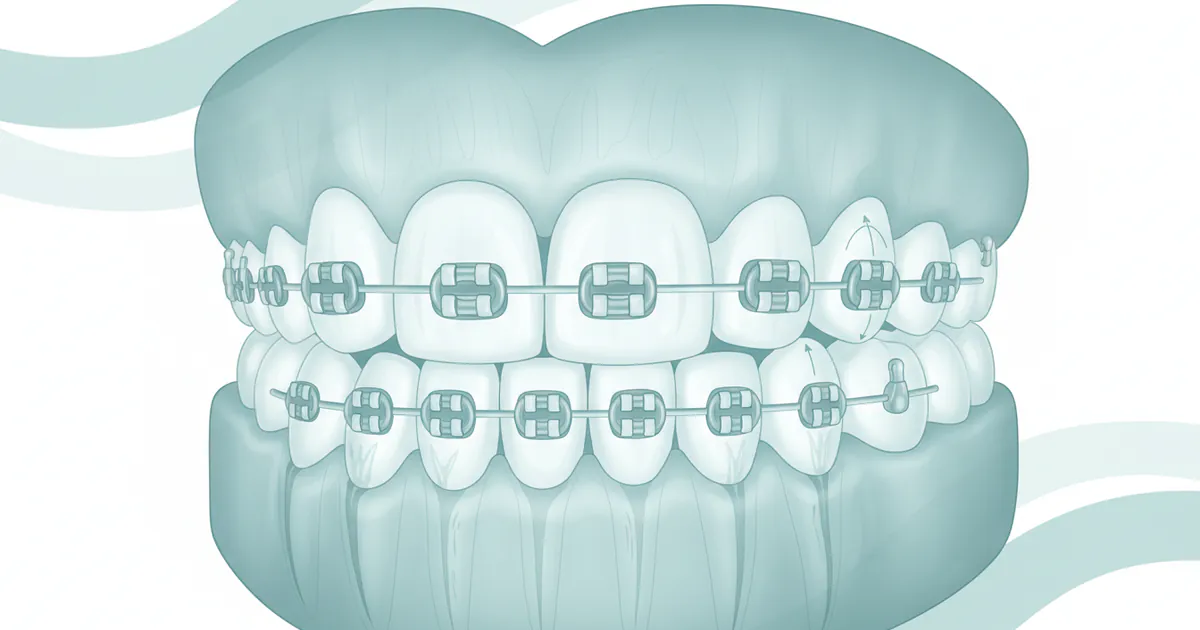
Traditional Metal Braces
- Description: These are the most common and recognizable type of braces. They consist of high-grade stainless steel brackets, an archwire, and elastic ligatures.
- Color Customization: Excellent. Metal braces offer the widest range of color choices because the elastic ligatures are a prominent feature. The silver color of the brackets often provides a neutral backdrop, making most colors pop.
- Pros: Most durable, cost-effective, highly effective for complex cases, maximum color customization.
- Cons: Most visible type of braces.
Ceramic Braces
- Description: Similar in design to metal braces, but the brackets are made from clear or tooth-colored ceramic material, making them much less noticeable.
- Color Customization: Limited but possible. While you can still choose colored ligatures, most patients opt for clear or white ligatures to maintain the discreet appearance of ceramic braces. Darker colors can make the braces more noticeable, defeating the purpose for some. White ligatures can sometimes stain and appear yellowish between appointments.
- Pros: Less noticeable than metal braces, effective treatment.
- Cons: More fragile than metal, can be slightly more expensive, clear ligatures can stain, treatment may take a bit longer.
Lingual Braces
- Description: These are custom-made braces that are bonded to the inside (lingual side) of your teeth, making them virtually invisible from the outside.
- Color Customization: None. Lingual braces use brackets and wires, but because they are on the back of your teeth, there's no aesthetic reason for colored ligatures. The ligatures are typically clear or tooth-colored and designed for function only.
- Pros: Completely invisible from the front, highly effective.
- Cons: Can be more expensive, may affect speech initially, can be harder to clean, discomfort for the tongue.
Clear Aligners (e.g., Invisalign)
- Description: These are a series of custom-made, clear, removable plastic trays that gradually shift your teeth.
- Color Customization: None. Clear aligners do not use brackets or wires, and therefore no elastic ligatures. They are designed to be nearly invisible.
- Pros: Nearly invisible, removable for eating and cleaning, generally more comfortable.
- Cons: Requires strong patient compliance (must be worn 20-22 hours/day), not suitable for all complex cases, can be more expensive than traditional braces.
Conclusion: If you're excited about choosing brace colors, traditional metal braces are your best bet. While ceramic braces offer some color options, the desire for discretion usually steers patients towards clear or white ligatures, which come with their own maintenance considerations.
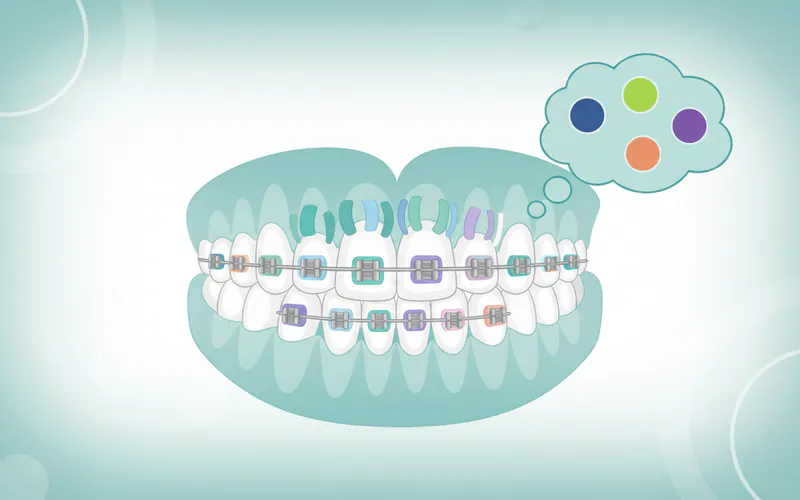
Factors Influencing Braces Color Choices
Choosing the best braces colors is a fun and personal decision, but several factors can influence your choice. It's not just about what looks good initially, but also what will continue to look good and feel right until your next appointment.
Your Skin Tone
Just like clothing or makeup, certain colors complement different skin tones.
- Fair Skin Tones: Cooler colors like light blue, silver, purple, and green often look appealing. Pastel shades can also be a good choice.
- Medium Skin Tones: A wider range of colors works well, including blues, greens, reds, oranges, and even brighter shades.
- Darker Skin Tones: Bright, vibrant colors like turquoise, royal blue, emerald green, gold, and pink can truly pop and look fantastic.
Your Eye Color
Matching your brace colors to your eye color can create a harmonious and striking look. For example, blue ligatures can enhance blue eyes, and green can complement hazel or green eyes.
Your Favorite Colors / Personal Style
This is perhaps the most straightforward factor. If you love a certain color, why not wear it on your braces? Your braces are a temporary accessory, so they're a great way to express your personality. You can match them to your wardrobe, school colors, or even your favorite sports team.
School/Team Colors
Many students choose to show their school spirit or support for their favorite sports team by selecting colors that match. This is a popular option, especially during sporting seasons.
Holidays and Seasons
This is a fantastic way to keep your braces fun and festive!
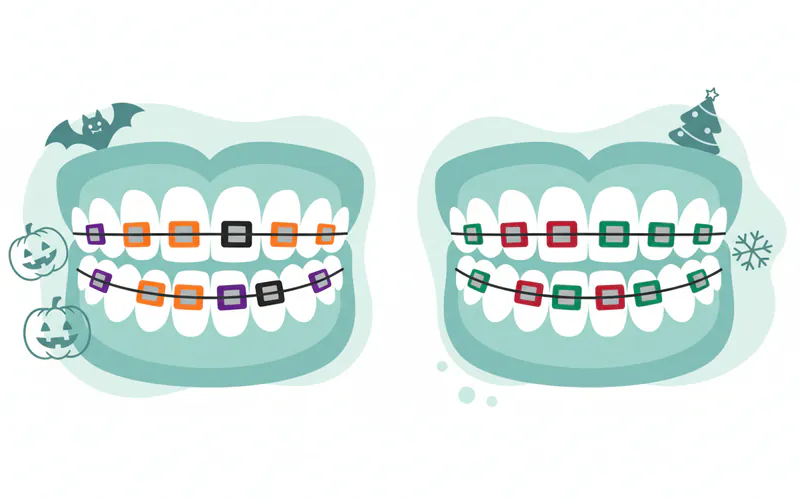
- Halloween: Orange and black, or purple and green.
- Christmas: Red and green.
- Valentine's Day: Red and pink.
- Fourth of July: Red, white, and blue.
- Spring: Pastels like light pink, baby blue, or lavender.
- Fall: Deep reds, oranges, and browns.
Avoiding Certain Colors
While most colors are fair game, some might not be the "best" choice for everyone:
- White/Clear: While initially discreet, these are highly prone to staining from food and drinks, quickly turning yellowish or brownish. This can make your teeth appear dirtier or discolored.
- Light Green/Brown: These can sometimes be mistaken for food particles stuck in your braces, or in the case of light green, might appear like spinach!
- Yellow: Yellow ligatures can make your teeth appear more yellow or stained.
- Black: Some people find black ligatures resemble decaying food or shadows, though others prefer them for a bold contrast.
- Very Dark Colors (e.g., Dark Blue/Purple): These can make your teeth appear whiter by contrast, which is a popular "pro" for many patients.
Pro Tip: If you're unsure about a color, ask your orthodontist's office if they have a color wheel or a mirror where you can hold up different ligature samples against your teeth to see how they look before they are applied.
The Braces Color Change Process
Choosing and applying your new braces colors is a quick and routine part of your orthodontic adjustment appointment. Here's what you can expect:
Step 1: Arrival and Initial Check-up
When you arrive for your appointment, your orthodontic team will typically perform a brief check of your overall oral hygiene and the condition of your braces. They might clean your teeth if necessary and look for any broken brackets or issues with the archwire.
Step 2: Removal of Old Ligatures
Using specialized dental tools, your orthodontist or a trained dental assistant will carefully remove all the old elastic ligatures from each bracket. This process is usually very quick and painless. You might feel a slight pressure as they pop off, but no discomfort.
Step 3: Archwire Adjustment (if needed)
After the old ligatures are off, the archwire is completely free. This is the opportunity for your orthodontist to make any necessary adjustments. They might:
- Bend the existing archwire to apply new forces.
- Replace the archwire with a new, stiffer, or differently shaped one to continue the tooth movement.
- Add power chains (continuous elastic chains that pull teeth together) or other elastic modules. This is the part of the appointment that physically moves your teeth, and you might feel some mild pressure or soreness afterward.
Step 4: Choosing Your New Colors
This is the fun part! The dental assistant will typically present you with a color wheel or a chart showing all the available ligature colors. You can choose a single color for all your brackets, alternate two colors, or even select a different color for each tooth if you're feeling adventurous (though this is less common). Don't be shy about asking for recommendations or trying out colors.
Step 5: Application of New Ligatures
Once you've made your selection, the dental assistant will use a small, pointed tool called a ligature gun or hemostat to stretch and place the new elastic bands around each bracket, securing the archwire firmly in place. This is also a quick and painless process. They will ensure all ligatures are correctly seated and secure.
Step 6: Final Check and Instructions
Your orthodontist will do a final check to ensure everything is in order. They might trim any excess archwire that's poking out and give you any specific instructions for care until your next appointment. This is also a good time to ask any questions you have about your braces or upcoming treatment. The entire process of ligature change and adjustment usually takes 15-30 minutes.
Oral Hygiene and Aftercare for Colored Braces
Maintaining excellent oral hygiene is paramount throughout your orthodontic treatment, and it plays a direct role in how vibrant and appealing your chosen brace colors remain. Poor hygiene can lead to staining of ligatures and, more importantly, tooth decay and gum issues.
Brushing Technique
- Frequency: Brush your teeth after every meal and snack, or at least twice a day for two minutes each time.
- Tools: Use a soft-bristled toothbrush. An orthodontic toothbrush with a V-shaped cut can be particularly effective for cleaning around brackets. Electric toothbrushes are also highly recommended.
- Method:
- Brush above the brackets, angling the brush downwards towards the wire and gums.
- Brush below the brackets, angling the brush upwards towards the wire and gums.
- Brush the chewing surfaces and the inside surfaces of your teeth.
- Pay extra attention to the areas around the brackets and under the archwire where food particles tend to accumulate.
Flossing with Braces
Flossing is challenging but absolutely essential with braces.
- Tools: Use waxed floss, floss threaders, or orthodontic picks (like Platypus Ortho Flossers) specifically designed for braces. Water flossers (oral irrigators) are also highly effective for dislodging food particles and plaque.
- Method (with floss threader):
- Thread a piece of floss through the loop of the floss threader.
- Guide the threader under or over the archwire between two teeth.
- Once the floss is through, remove the threader and gently slide the floss up and down each side of the tooth, cleaning below the gumline.
- Repeat for every space between your teeth.
Mouthwash
- Rinse Daily: Use an antiseptic mouthwash to help kill bacteria and reduce inflammation, and a fluoride mouthwash to strengthen enamel and prevent cavities. Your orthodontist might recommend a specific type.
- Post-Meals: Rinsing with plain water after meals and snacks can help dislodge food particles before they stick.
Foods to Avoid (to Prevent Staining)
Certain foods and drinks are notorious for staining lighter-colored ligatures. If you've chosen white, clear, or pastel ligatures, be particularly mindful:
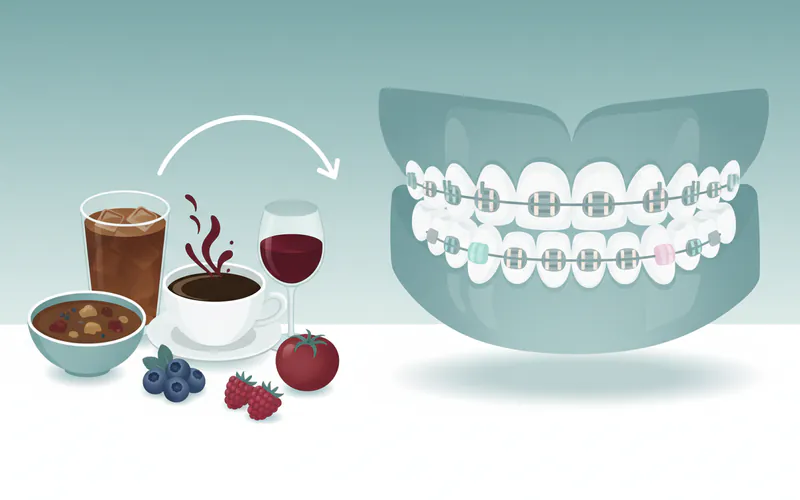
- Dark-colored beverages: Coffee, tea, dark sodas (cola), red wine.
- Highly pigmented foods: Curry, turmeric, mustard, tomato sauce, berries (especially blueberries, raspberries), dark fruit juices, beets.
- Sweets: Hard candies, lollipops, brightly colored candies can transfer their dyes.
Pro Tip: If you consume staining foods or drinks, rinse your mouth thoroughly with water immediately afterward, and brush your teeth as soon as possible. Using a straw for dark beverages can also help minimize contact with your braces.
Regular Orthodontic Check-ups
Continue attending all your scheduled orthodontic adjustment appointments. These visits are not only for changing your colors but also for ensuring your treatment is progressing correctly, addressing any issues, and maintaining the health of your teeth and gums.
Risks and Complications (Related to Colors)
While choosing brace colors is generally safe and low-risk, there are a few minor considerations:
- Aesthetic Dissatisfaction: You might choose a color combination that you dislike once it's on your teeth. While you can't change it immediately (unless you call your orthodontist for an unscheduled visit, which may incur a fee), remember it's only for a few weeks until your next appointment.
- Staining and Discoloration: As mentioned, lighter ligatures (especially white and clear) are highly susceptible to staining from certain foods and drinks. This can make them look dingy or yellowish, which can be aesthetically unappealing.
- Allergic Reactions (Extremely Rare): While medical-grade elastics are used, an allergic reaction to the rubber or silicone material is theoretically possible, though exceptionally rare. Symptoms would include irritation, redness, or swelling around the brackets. If you suspect an allergy, contact your orthodontist immediately.
The risks associated with brace colors are minimal and primarily aesthetic. The overall risks of orthodontic treatment itself (e.g., root resorption, decalcification, discomfort) are separate from the color choices.
Children / Pediatric Considerations for Braces Colors
For children and teenagers, braces colors are often a significant part of their orthodontic experience, turning what could be a daunting treatment into an opportunity for self-expression and fun.
- Empowerment and Engagement: Allowing children to choose their brace colors gives them a sense of control and ownership over their treatment. This can boost their morale and compliance, making them more likely to take care of their braces.
- Popular Choices for Kids:
- Bright and Bold: Neons, vibrant blues, reds, purples, and greens are perennial favorites.
- School Spirit: Matching school colors for sporting events or spirit week is very common.
- Holiday Themes: Seasonal colors for Halloween, Christmas, or patriotic holidays are a hit.
- Favorite Characters/Themes: Some kids try to mimic colors of superheroes, sports teams, or even video game characters.
- Alternating Colors: Two-color combinations are incredibly popular, like alternating blue and green, or red and black.
- Parental Guidance: While giving children freedom of choice is good, parents can offer gentle guidance. For example, explain why white or clear might stain quickly, or why yellow can make teeth look less bright. Encourage them to think about how they'll feel about their choices for the next few weeks.
- Oral Hygiene Education: This is a prime opportunity to reinforce the importance of meticulous oral hygiene. Explain that proper brushing and flossing not only keep their teeth healthy but also keep their chosen brace colors looking fresh. Show them how staining foods can affect their cool colors.
- Social Aspects: Brace colors can be a conversation starter among peers, fostering a sense of community among kids with braces.
Pro Tip for Parents: Consider letting your child have one "wild card" choice (like white or yellow) for one appointment if they're adamant, just so they can experience the staining firsthand. They'll likely be more receptive to your advice about darker, more stain-resistant colors next time!
Cost Breakdown and Insurance for Braces
It's important to clarify that choosing brace colors does not add to the overall cost of your orthodontic treatment. The elastic ligatures are a standard component of traditional braces, and their replacement and color selection are included in your regular adjustment appointments. The "cost" associated here refers to the overall investment in orthodontic treatment.
Average US Costs for Braces (Overall Treatment)
The cost of braces varies significantly based on the type of braces, the complexity of the case, the duration of treatment, and the geographic location within the US.
| Type of Braces | Average US Cost Range (Without Insurance) |
|---|---|
| Traditional Metal | $3,000 - $7,500 |
| Ceramic Braces | $4,000 - $8,000 |
| Lingual Braces | $8,000 - $12,000+ |
| Clear Aligners | $3,500 - $8,500 |
- Low End: Often for simpler cases, single arch treatment, or in areas with lower cost of living.
- Mid-Range: Most common range for typical full orthodontic treatment.
- High End: Complex cases, longer treatment times, or in high-cost-of-living areas (e.g., major metropolitan cities).
With vs. Without Insurance
- Without Insurance: If you don't have dental insurance with orthodontic coverage, you will be responsible for the full cost. Many orthodontists offer payment plans (see below).
- With Insurance: Dental insurance plans often have specific orthodontic benefits.
- Coverage: Typically, dental insurance might cover 20-50% of the cost of braces, up to a lifetime maximum.
- Lifetime Maximum: This is a cap on how much the insurance company will pay for orthodontic treatment over your lifetime. Common maximums range from $1,000 to $3,000.
- Waiting Periods: Some plans have waiting periods (e.g., 6-12 months) before orthodontic benefits become active.
- Age Limits: Orthodontic coverage is more common for children under 18; adult orthodontic coverage may be more limited or require a separate rider.
- Pre-authorization: Your orthodontist's office will typically help you submit a pre-treatment estimate to your insurance company to understand your exact coverage.
Payment Plans and Financing Options
Recognizing that orthodontic treatment is a significant investment, most orthodontists offer various financing solutions:
- In-house Payment Plans: Many practices offer interest-free payment plans, allowing you to pay a down payment and then spread the remaining balance over the course of treatment (e.g., 18-36 months).
- Third-Party Financing: Companies like CareCredit or LendingClub offer specialized healthcare financing with various interest rates and repayment terms.
- Flexible Spending Accounts (FSAs) and Health Savings Accounts (HSAs): If you have an FSA or HSA through your employer, you can use these tax-advantaged accounts to pay for orthodontic treatment.
- Discount Plans: Some dental discount plans offer reduced fees for orthodontic services, but these are not insurance.
Cost-Saving Tips
- Consult Multiple Orthodontists: Get quotes from 2-3 different orthodontists in your area. While quality of care is paramount, prices can vary.
- Inquire About Discounts: Ask if they offer discounts for paying in full upfront (some do, typically 5-10%).
- Explore Dental Schools: If you live near a dental school, you might find reduced rates for treatment performed by supervised residents.
- Maintain Excellent Oral Hygiene: Preventing cavities or gum disease during treatment will save you from additional dental costs.
- Understand Your Insurance: Maximize your insurance benefits by understanding your plan's details and lifetime maximums.
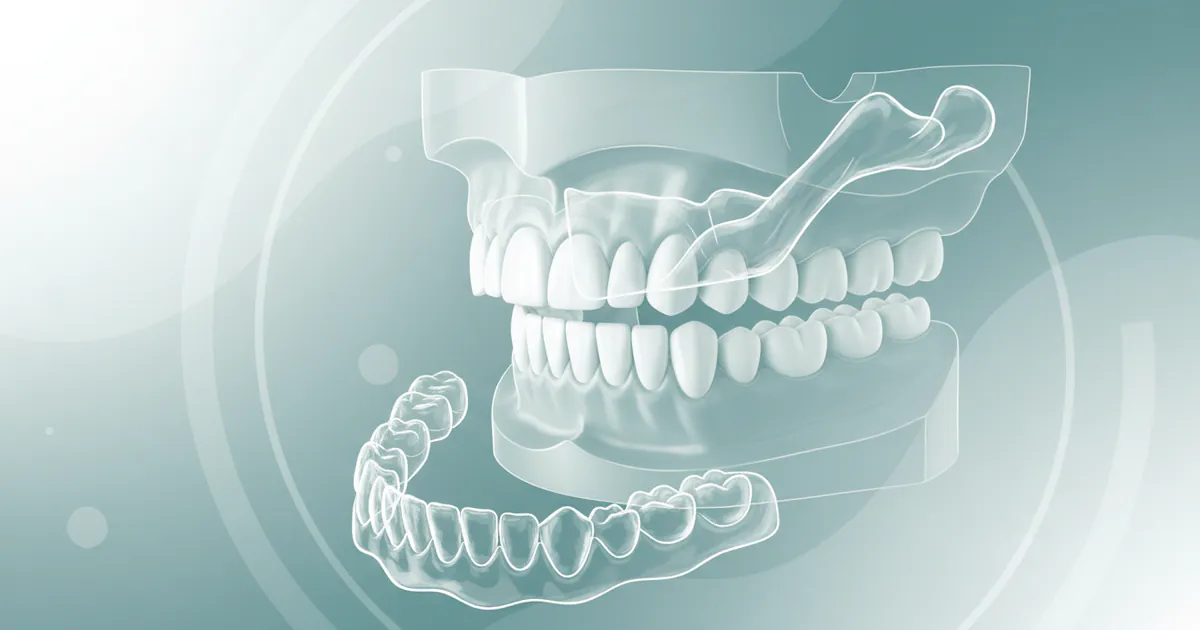
Recovery and Aftercare: Beyond the Colors
Once your braces are off, your orthodontic journey isn't over. The retention phase is critically important to ensure your teeth remain in their new, beautiful positions. This is where an Essix retainer or other types of retainers come into play.
The Importance of Retention
After braces are removed, your teeth have a natural tendency to shift back to their original positions – a phenomenon known as relapse. This is because the bone and gum tissues surrounding your teeth need time to solidify and adapt to their new placements. Retainers are designed to prevent this relapse, holding your teeth in alignment until they are stable.
The American Dental Association (ADA) emphasizes that retainer wear is a lifelong commitment, particularly in the initial years following orthodontic treatment.
Types of Retainers
-
Essix Retainers (Clear Plastic Retainers):
- Description: These are custom-made, clear plastic trays that fit snugly over your teeth, similar to clear aligners. They are nearly invisible.
- Pros: Highly aesthetic, comfortable, removable for eating and brushing.
- Cons: Can be lost or damaged, require diligent cleaning, may not be as durable as Hawley retainers. Can warp with hot water.
- Wear Schedule: Initially worn full-time (except for eating and brushing) for several months, then transitioning to nightly wear, and eventually a few nights a week indefinitely.
-
Hawley Retainers:
- Description: These are made of a custom-fitted acrylic plate that sits against the roof of your mouth (upper retainer) or on the inside of your lower teeth, with a metal wire that wraps around the front of your teeth.
- Pros: Very durable, adjustable, can be used for minor tooth movements if relapse occurs, allows teeth to settle into a more natural bite.
- Cons: More noticeable than Essix retainers, can affect speech initially, may be less comfortable than Essix retainers.
- Wear Schedule: Similar to Essix retainers, with an initial full-time period followed by nightly wear.
-
Fixed (Bonded) Retainers:
- Description: A thin, custom-fitted wire is permanently bonded to the back (lingual side) of your front teeth, typically the lower front six teeth.
- Pros: "Invisible" from the front, constant retention (no compliance issues), very effective at preventing relapse in the bonded area.
- Cons: Can be challenging to clean around (requires special flossing techniques), can break or debond, does not prevent movement of teeth not covered by the wire.
- Wear Schedule: Permanent (left in place for many years, sometimes indefinitely).
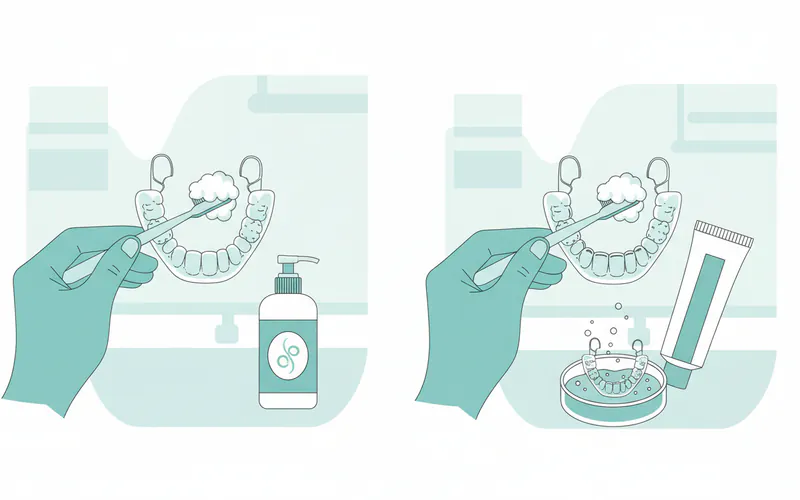
Retainer Care
- Cleaning:
- Removable Retainers (Essix & Hawley): Clean daily with a toothbrush and mild soap or non-abrasive toothpaste. You can also use special retainer cleaning tablets. Rinse thoroughly with cool water. Avoid hot water, which can warp Essix retainers.
- Fixed Retainers: Floss carefully under and around the wire using a floss threader or water flosser. Brush diligently to prevent plaque buildup.
- Handling: Always store removable retainers in their case when not wearing them to prevent loss or damage. Keep them away from pets, who love to chew on them.
- Replacement: Retainers can wear out or break over time. It's crucial to contact your orthodontist if your retainer breaks or no longer fits properly, as a replacement will be needed to prevent relapse. Replacement Essix retainers typically cost $100-$300 per arch.
Pro Tip: Even if you have a fixed retainer on your lower teeth, your orthodontist will almost always recommend a removable retainer for your upper teeth, and often for the lower as well, to provide comprehensive retention and allow for adjustment if needed. Do not underestimate the importance of wearing your retainers as instructed – it's the final, crucial step to preserving your beautiful new smile!
Comparison Table: Popular Braces Color Choices
When deciding on the best braces colors, considering various aesthetic outcomes can be helpful. Here's a comparison of common color strategies:
| Color Strategy | Pros | Cons | Best For |
|---|---|---|---|
| Dark Colors | Make teeth appear whiter by contrast; less prone to staining. | Can be perceived as bold or stand out more. | Those wanting whiter-looking teeth; good for formal settings. |
| (e.g., Dark Blue, Purple, Teal, Black) | |||
| Light/Pastel Colors | Soft, gentle aesthetic; good for complementing fair skin. | Highly prone to staining; can make teeth look less white. | Individuals with fair skin; those who prefer a subtle look. |
| (e.g., Light Pink, Lavender, Mint Green, Light Blue) | |||
| Vibrant/Bright Colors | Fun, expressive, eye-catching; great for showing personality. | Can draw attention to braces; some shades might clash with outfits. | Children and teenagers; those who embrace personalization. |
| (e.g., Neon Green, Hot Pink, Royal Blue, Orange) | |||
| Neutral/Clear/White | Most discreet option; blends with teeth. | Most prone to severe staining; can appear yellowish/dingy. | Patients prioritizing discretion (especially with ceramic braces). |
| (e.g., Clear, White, Silver) | |||
| Alternating Colors | Creative, allows for personalization, can be festive. | Requires more thought in combination; can appear busy. | Those wanting to express creativity or celebrate holidays/teams. |
| (e.g., School colors, Holiday themes) |
Frequently Asked Questions
What are the most popular braces colors?
Popular choices often include various shades of blue (especially royal blue or light blue), purple, pink, and red. Black and dark green are also popular for a bolder look or to make teeth appear whiter. For holidays, red and green (Christmas) or orange and black (Halloween) are big hits.
How often can I change my braces colors?
You can typically change your braces colors at every adjustment appointment, which usually occurs every 4 to 8 weeks. This means you get several opportunities throughout your treatment to try out different colors and combinations!
Does choosing braces colors hurt?
No, changing the elastic ligatures does not hurt. You might feel a slight pressure as the old bands are removed and new ones are put on, but it's a very quick and painless process. Any discomfort associated with braces comes from the tightening of the archwire, which moves your teeth, not the colors themselves.
Can I mix and match colors?
Absolutely! Many patients choose to alternate two colors on their top or bottom arches, or even select different colors for each tooth for a truly unique look. Your orthodontist's office will be happy to help you with your creative choices.
Will certain colors make my teeth look whiter?
Yes, darker colors tend to create a contrast that can make your teeth appear whiter. Shades like dark blue, purple, and even black are often chosen for this effect. Conversely, yellow or light green ligatures can make your teeth look more stained or discolored.
What colors should I avoid for braces?
It's generally recommended to avoid white or clear ligatures if you consume staining foods and drinks regularly, as they can quickly turn yellow or brown. Yellow ligatures can make your teeth appear discolored, and light green or brown might be mistaken for food particles.
What if I don't like my color choice?
If you're truly unhappy with your chosen colors, you can call your orthodontist's office. While they might not offer an unscheduled appointment just for a color change, they might be able to squeeze you in or advise you to wait until your next scheduled adjustment in a few weeks. Remember, it's only a temporary decision!
Are clear aligners like Invisalign customizable with colors?
No, clear aligners such as Invisalign do not use brackets and elastic ligatures, so there are no color customization options. They are designed to be virtually invisible. If color customization is important to you, traditional metal braces would be the preferred option.
What is an Essix retainer, and why is it mentioned with braces colors?
An Essix retainer is a type of clear, removable retainer worn after braces treatment to maintain the teeth's new position. While not directly related to braces colors, it's crucial to discuss post-treatment care like retainers as part of the complete orthodontic journey. It ensures the beautiful smile you achieved with braces (and customized colors!) remains stable.
Can adults choose colors for their braces?
Yes! There's no age limit on choosing braces colors. While many adults opt for more discreet options like clear ceramic ligatures or clear aligners, those who choose traditional metal braces are just as welcome to pick fun and expressive colors as teenagers or children. It's a great way to embrace your orthodontic journey.
When to See an Orthodontist
While choosing fun brace colors is an exciting part of the orthodontic experience, it's important to remember that braces are a medical treatment to correct dental issues. Regular visits to your orthodontist are crucial, and there are specific situations where you should seek professional attention outside of your scheduled appointments.
Routine Orthodontic Care
- Scheduled Adjustment Appointments: These are typically every 4-8 weeks, where your orthodontist will monitor progress, adjust wires, and change ligatures. Do not miss these appointments, as they are vital for effective treatment.
- Regular Dental Check-ups: Continue seeing your general dentist every six months for cleanings and check-ups. They will work in conjunction with your orthodontist to ensure your overall oral health is maintained.
When to Seek Immediate Attention (Red Flags)
Contact your orthodontist's office as soon as possible if you experience any of the following:
- Severe Pain or Discomfort: While some soreness is normal after adjustments, sharp, persistent, or increasing pain that isn't relieved by over-the-counter pain relievers warrants a call.
- Broken or Loose Bracket: A bracket that has come off a tooth or is loose needs to be reattached to ensure effective tooth movement.
- Poking or Protruding Wire: If an archwire has shifted or broken and is poking your cheek, tongue, or gum, it can cause significant irritation and needs to be trimmed or adjusted. You can try to push it back with a cotton swab or cover it with orthodontic wax in the meantime.
- Lost Ligature or Power Chain: While a single lost elastic ligature might not be an emergency, losing several or a power chain can impact tooth movement. Call your office for advice.
- Swelling or Infection: Any unexplained swelling in your gums, cheeks, or jaw, or signs of infection (like pus or fever), should be reported immediately.
- Difficulty Eating or Speaking: Persistent issues that interfere with daily functions could indicate a problem with your braces.
- Trauma to the Mouth: If you've experienced an injury to your mouth or face while wearing braces, even if they seem fine, it's wise to get them checked by your orthodontist or a dentist.
Your orthodontic team at SmilePedia.net understands the importance of your smile and overall oral health. If you are considering braces, or are already undergoing treatment and have questions, don't hesitate to reach out to a qualified orthodontist near you. They can provide personalized advice and ensure your journey to a perfect smile is as smooth and successful as possible.
Frequently Asked Questions
Medically Reviewed Content
This article was written by our dental health editorial team and reviewed for medical accuracy. Our content follows strict editorial guidelines for reliability and trustworthiness.
Medical Disclaimer
This article is for informational purposes only and does not constitute medical advice. Always consult with a qualified dental professional for diagnosis and treatment. Do not delay seeking professional advice because of something you read on this website.
Related Articles
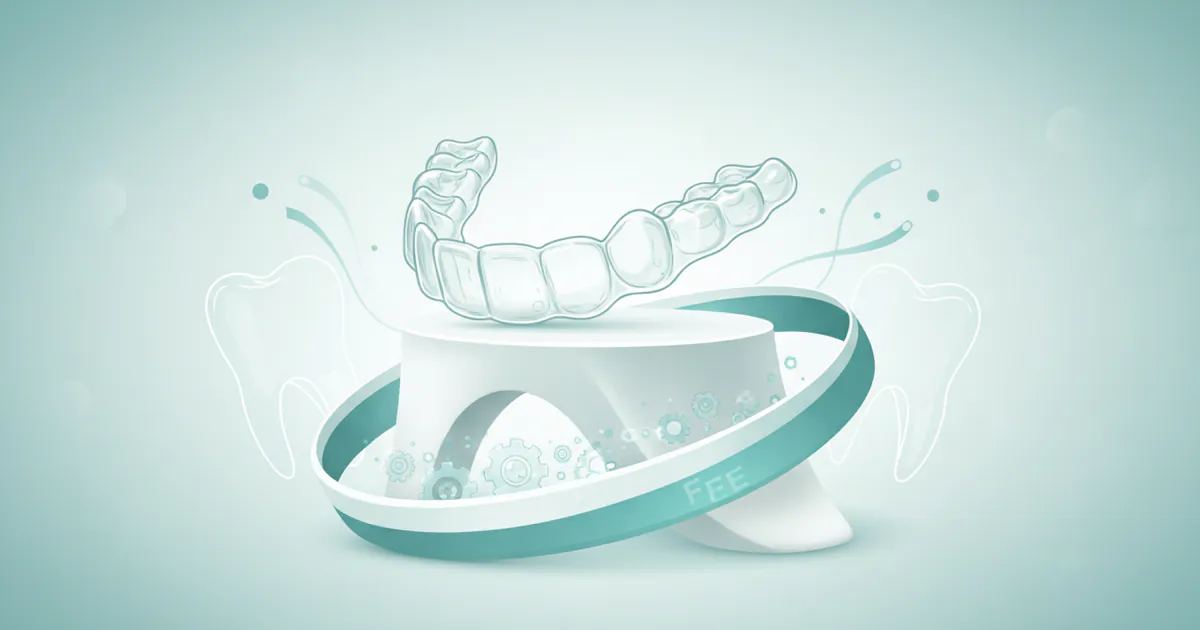
Retainer Fee: Complete Guide
The journey to a perfectly aligned smile doesn't end when your braces come off or your last clear aligner tray is discarded. In fact, a crucial phase, often overlooked but absolutely essential for maintaining your results, begins: retention. For many, the idea of a retainer fee can be an unexpec
February 22, 2026
Braces for Adults: Complete Guide
Braces for Adults: Complete Guide Category: Orthodontics
February 22, 2026
Invisalign Braces: Complete Guide
A radiant, perfectly aligned smile is more than just aesthetically pleasing; it's a gateway to improved oral health, enhanced confidence, and even better overall well-being. For millions of Americans seeking to correct misaligned teeth, the thought of traditional metal braces can be daunting, often
February 22, 2026
Adult Braces: Complete Guide
Adult Braces: Complete Guide
February 22, 2026